- Adding a site to the testing scope
By telling ZAP what the target site is, ZAP can limit the scope of the scan and only scan the target site for vulnerabilities.
- Open the web application that you want to test.
- In Zap you will find your website/application is displayed under sites.
- To add your site to the scope of the test, right click on the target address and select Include in Context>New Context. This will tell ZAP to perform scans only on this particular site and ignore all other requests and responses.
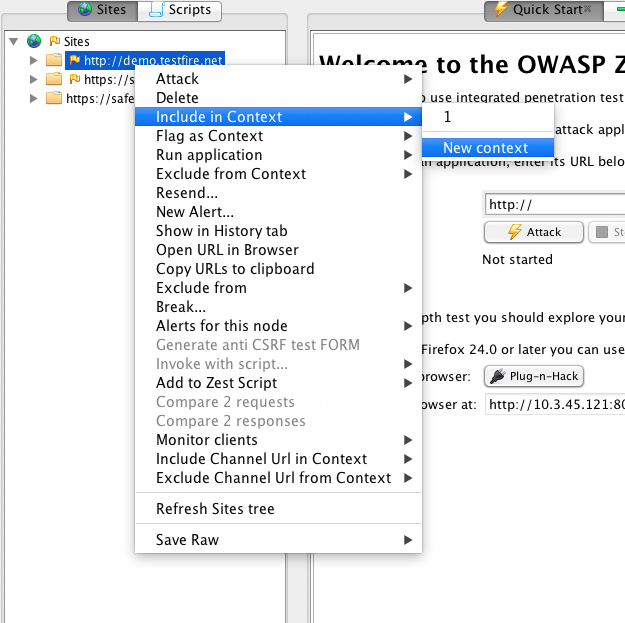
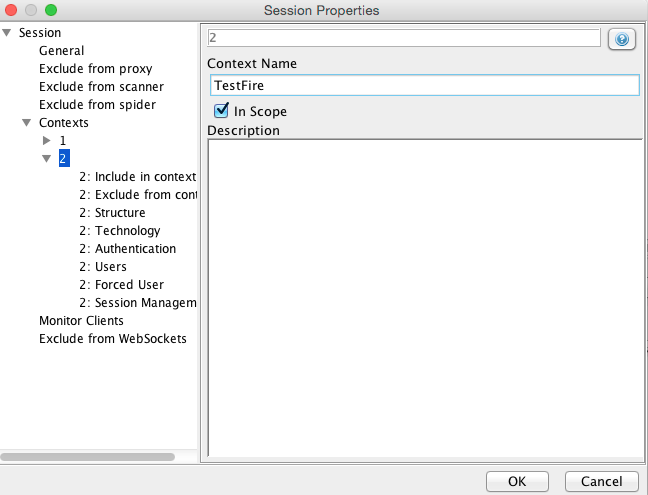
- Choose a suitable name and set it as a context name (Eg: testfire)
- If your application has multiple sites you can add all of them by right clicking on the URL and selecting “Include in Context”>”TestFire”
- User Log Out detection
While ZAP is performing scans on the target sites, the session might become invalidated (ZAP may have visited the logout link or the session may have timed out). To make sure ZAP always has an active session to scan, we need to use the logout detection capability of ZAP.
- Log in to your application
- Click on the logout link
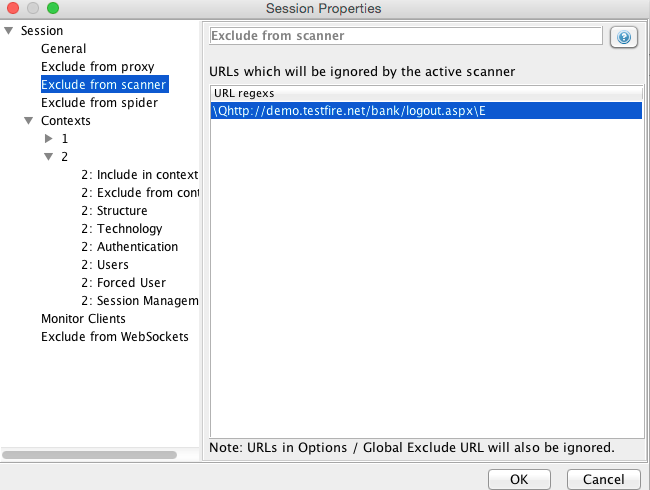
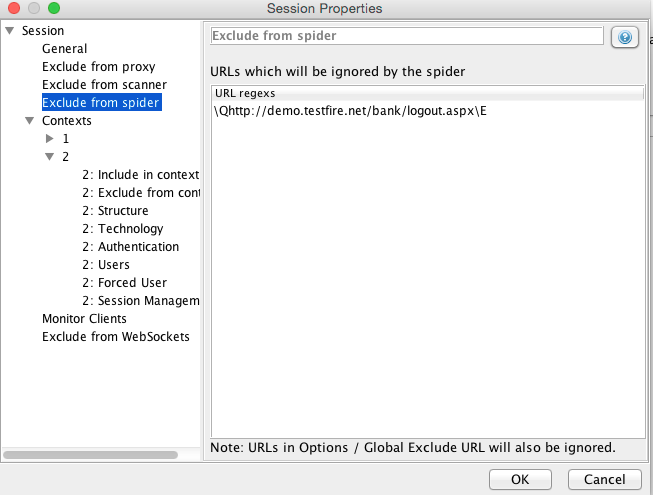
- In Zap, navigate to the page which invokes the logout request. Right click and select “Exclude from” > “Scanner”. Click OK.
- Again right click on the same link and select “Exclude from” > “Spider”
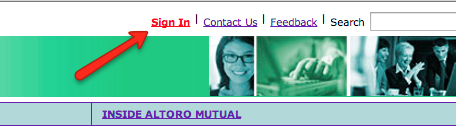
- Optionally you may identify part of the page source which signifies that a user has logged out. For example in the testfire website, a “Sign in” link is shown only when the user is not authenticated or when the user is logged out.
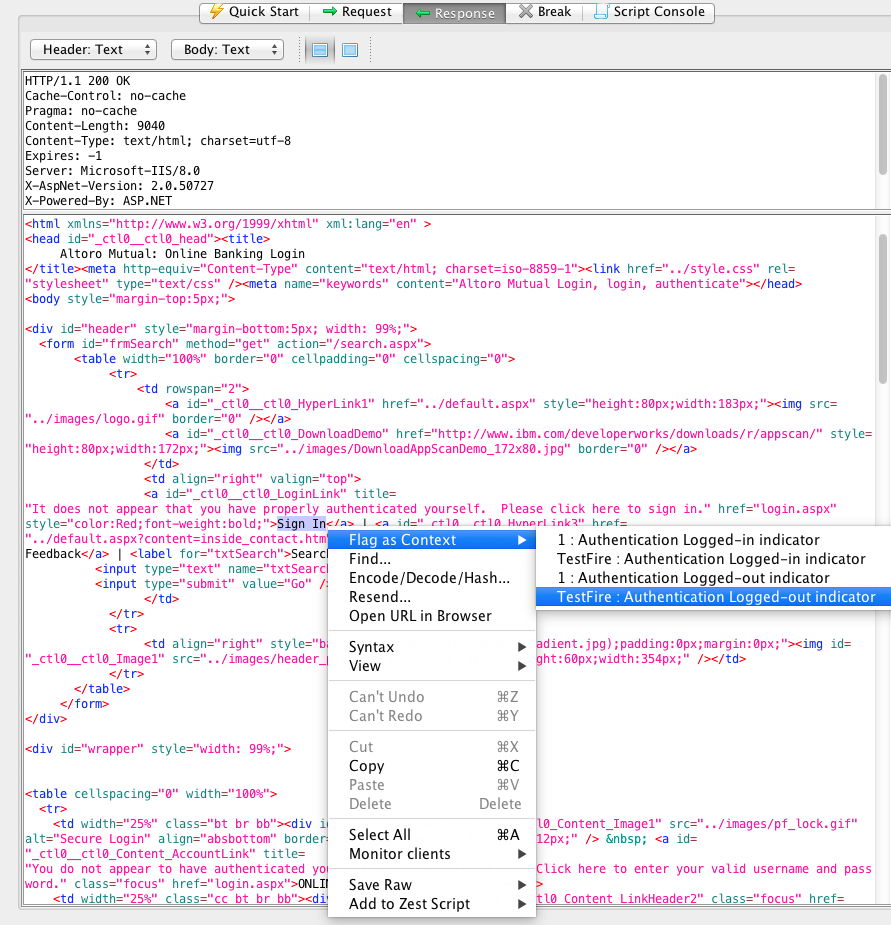
- Find the part of the response in ZAP where the “Sign in” text is displayed. Right click on the source code and select “Flag as Context”> “TestFire: Authentication Logged out indicator”. Click “Ok”.
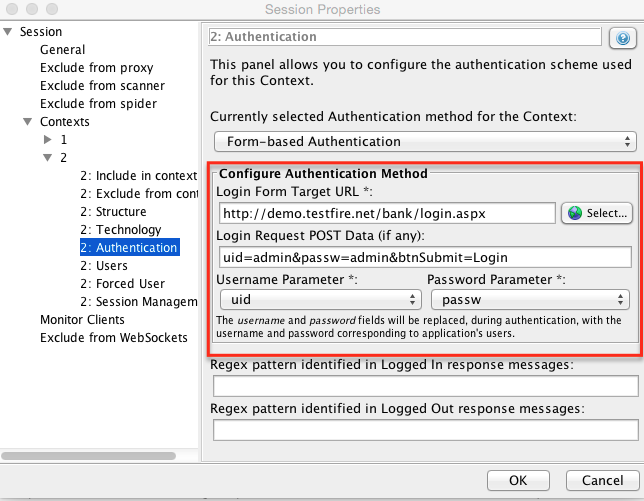
- User Auto-login if logged out (Only for applications with form based authentication)
If user does get logged out during the course of testing, ZAP can automatically log back in so that it can continue with the tests. This functionality only works if your application has form based authentication.
- Log in to your application
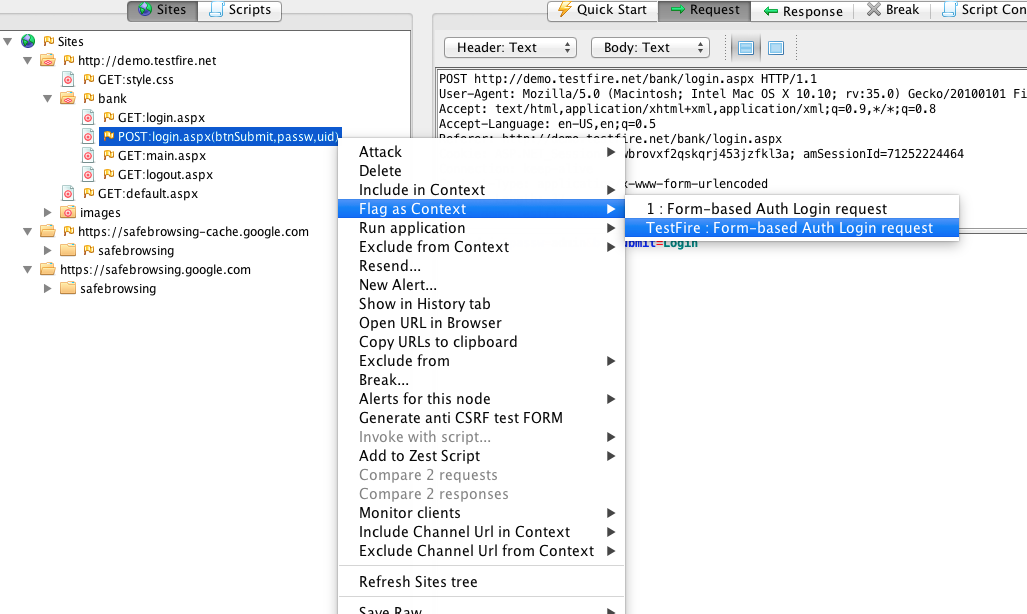
- Check for the request that was sent when the application was authenticated (logged in). Right click on the request select “Flag as Context” > “TestFire: Form-based Auth Login request”
- In the session properties dialog that pops up make sure the Login URL is the same login URL of the application and the POST data is in the textbox. Make sure the username and password parameters are correct by selecting the appropriate username and password parameters from the list.
- In the left side bar click “Users” in the left side bar.
- Click Add
- Enter the username and password that your application uses
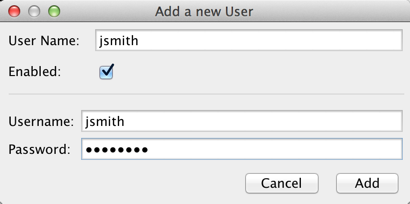
- Click add.
- Now click on “Forced User” in the left bar. This tells ZAP which credentials to use if the user is logged out. You can optionally configure multiple users for the same application, but ZAP will only use the user you chose as “Forced User”
- Make sure the user you have added is selected. Click OK
- If Forced User is configured and logged-out indicator is added, a new button should appear at the top called “Forced User Mode”

- Click on it to enable it. By enabling this option, the user is logged back in as soon as ZAP finds out that the user has been logged out.
- Go to your application and try to log out. If auto-login is configured correctly, you will get automatically logged back in.
- Starting the Spider
By using the Spider, ZAP will try to build up a detailed site map of your target application. ZAP tries to find each and every link, therefore its important to tell ZAP about the all the use cases before starting the spider.
- Once the above steps are done. You are ready to start the spider.
- Go through all the use cases of your application while still proxying through zap.
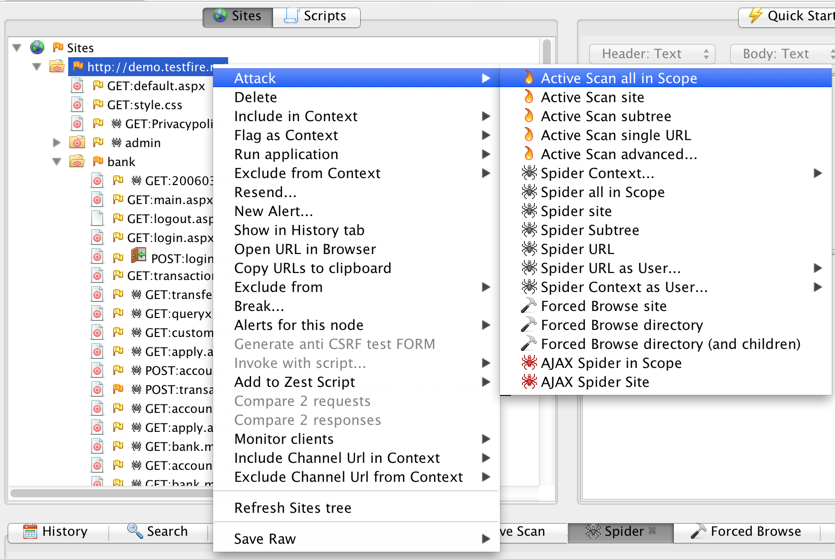
- In Zap, right click on your application website in left sidebar. Choose Attack>Spider all in Scope

- You will see the progress in the below Spider tab.
- Wait for the spider to be 100% complete. You can see the links found by ZAP in the left side bar.
- Starting the Scanner
By running the scanner, ZAP will try to find vulnerabilities in your application by performing various attacks. Its important to finish spidering before starting the scanner.
- Please make sure the spider is complete before starting the scanner
- Make sure the user is logged in (Or make sure auto-login is working fine)
- In Zap, right click on your application website in the left sidebar. Choose Attack>Spider all in Scope
- The scan might take anywhere from 5 minutes to a few hours depending on the size of your application. Please keep checking on your application (to which the proxy is hooked up) to make sure the user is still logged in and also that the site is still up.
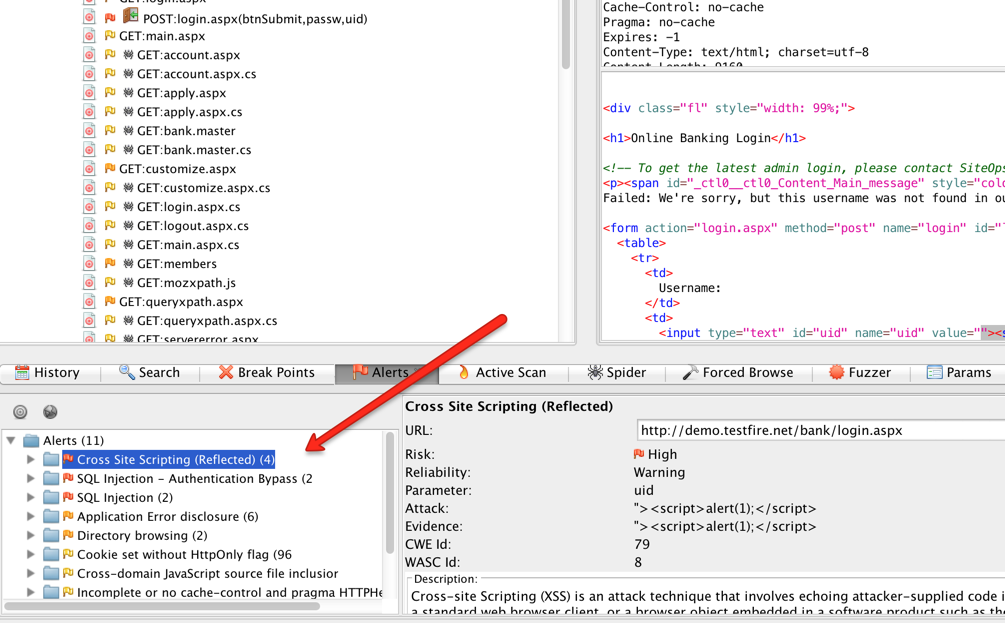
- Once the scan is complete, you will find the results in the alerts tab
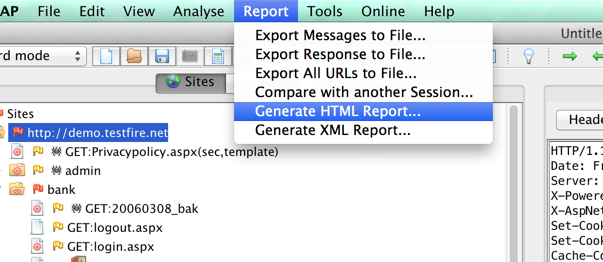
- Downloading the Report
- Extract the report by going to Report > Generate HTML report